Blog
How to Choose the Right Drywall Screw?
Choosing the right Drywall Screw is a small decision with visible consequences. The wrong fastener can protrude, loosen, or break through the paper face. A useful principle reflected in drywall author Myron R. Ferguson’s installation guidance is: match the screw to the board, framing, and conditions. This is a practical summary, not a verbatim quotation. Start by identifying what lies behind the panel. Wood studs generally call for coarse-thread screws; metal framing usually needs fine-thread screws. Board thickness also matters. A screw that is too short may not hold securely, while one that is too long can reach wiring or plumbing.
Look closely at the details. The screw head should sit just below the surface without tearing the paper. Set the driver clutch carefully, and test on a scrap piece if possible. A shallow dimple is right. A ragged hole is not. Corrosion-resistant options may suit damp locations, but follow the product and project specifications. Drywall type and framing material can change the recommendation, so check the manufacturer’s guidance before buying in bulk. Even experienced installers can overdrive a screw when moving quickly. That mistake is easy to miss until finishing compound reveals it. The sections ahead compare screw types, lengths, thread patterns, and common selection mistakes, helping you choose with confidence—and pause when the conditions are unclear.
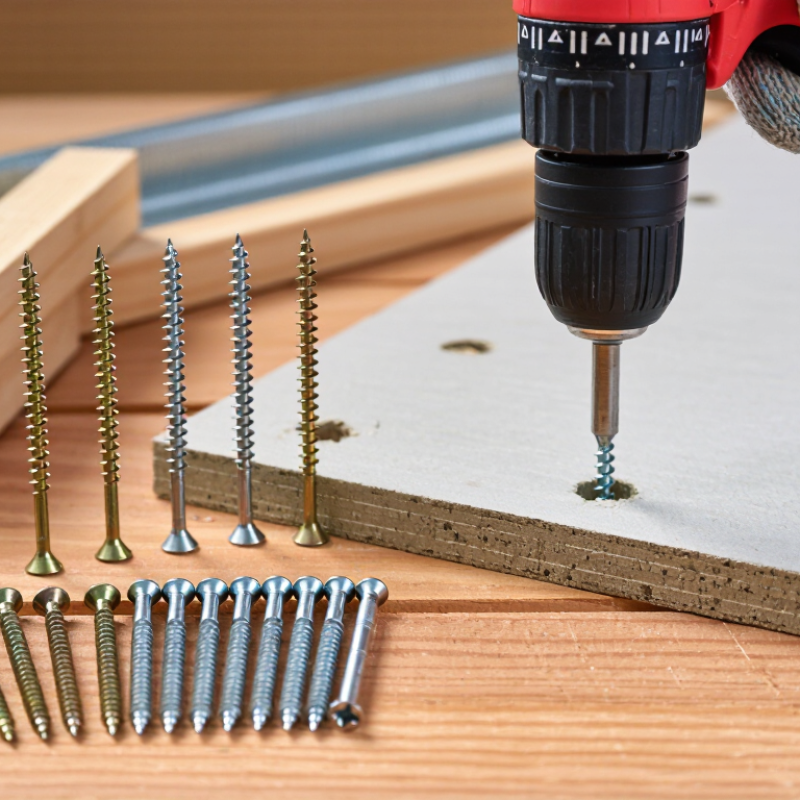
Identify the Drywall Material and Installation Conditions
How to Choose the Right Drywall Screw?
Identify the Drywall Material and Installation Conditions
Choosing a drywall screw starts with the board, not the toolbox. Standard gypsum board usually needs fine-thread screws for metal studs and coarse-thread screws for wood framing. Check the board thickness before selecting screw length. The screw should penetrate the framing securely without passing too deeply through the face paper.
Moisture-resistant boards need corrosion-resistant fasteners, especially in bathrooms, basements, and poorly ventilated rooms. Cement board is denser and may require specially hardened screws with suitable heads. For ceilings, longer screws can improve holding strength when the framing surface is uneven. I have seen installers use one screw type everywhere, then discover rust stains or loose panels months later. That shortcut saves minutes, not repairs.
Match Screw Length to the Combined Material Thickness
How to Choose the Right Drywall Screw?
Match screw length to the combined material thickness, not just the drywall panel. Measure every layer, including insulation board, soundproofing mat, and shims behind the panel. A single 1/2-inch drywall sheet usually needs a screw long enough to enter wood framing by about 5/8 to 1 inch. That often means a 1-1/4-inch screw, but framing conditions can change the choice.
For two drywall layers, add their thicknesses before selecting the screw. For example, two 1/2-inch panels create a 1-inch stack. A 1-5/8-inch screw may provide suitable framing engagement without penetrating too deeply. Check the actual measurement. Panels are not always exactly 1/2 inch thick, especially after finishing or moisture exposure.
I usually test one screw near the panel edge first. The head should sit slightly below the paper without breaking it. The tip must grip the framing firmly. Too short, and the sheet can loosen or flex. Too long, and the screw may contact hidden wiring or plumbing. That risk deserves attention. Metal framing requires different thread selection and penetration expectations, so do not copy wood-framing rules blindly. I once assumed a thicker backing layer was solid and had to replace several loose fasteners. That mistake was avoidable. Follow local building requirements and confirm the framing depth before production work.
Choose the Correct Screw Thread for the Wall Framing
How to Choose the Right Drywall Screw?
Choose the Correct Screw Thread for the Wall Framing
The wall framing decides the screw thread more than the drywall thickness does. For timber studs, choose coarse-thread drywall screws. Their deeper, wider threads bite into soft wood and hold firmly without excessive spinning. A 1/2-inch drywall panel commonly uses a 1 1/4-inch screw, but the framing and panel layers can change that choice.
For metal studs, use fine-thread screws, often with a sharp point or self-drilling tip. Fine threads grip thin steel more effectively and reduce the chance of stripping the metal. Test one screw first. If it turns without resistance, the tip may not suit the stud gauge. Heavier metal framing may require a different self-drilling screw and a stronger fastening method.
Check the screw head, too. It should sink slightly into the paper face without tearing it. A damaged paper surface weakens the panel’s hold and creates extra finishing work. Keep the drill at a steady speed and stop when the head dimples the drywall. Too much pressure is a common mistake.
Small details matter.
In mixed walls, do not assume every stud is identical. A renovation may contain timber beside metal framing, especially around repaired sections. I have seen installers use one screw type everywhere, then discover loose panels near the steel studs. That shortcut saves minutes, not quality. When uncertain, inspect the stud, test the thread, and follow the screw manufacturer’s load and installation guidance.
Select the Appropriate Screw Head and Coating
Choosing the right drywall screw begins with the head. A bugle-shaped head sinks into gypsum board without tearing the paper face. This creates a shallow, neat recess for joint compound. A flat or sharply edged head may cut the surface and weaken the hold. I usually test one screw on scrap board before starting. That small check prevents a wall full of visible damage.
The drive recess also matters. A Phillips-style recess is common, but the bit must fit tightly. If the bit wobbles, the head can strip before the screw reaches the correct depth. Use a screw long enough to enter the framing securely, while avoiding unnecessary penetration into pipes or wiring. Coarse threads generally suit wood framing, while fine threads are often better for metal studs. The framing material decides more than habit.
Coating protects the screw from its environment. Black phosphate coatings work well in dry indoor rooms and accept joint compound smoothly. Zinc-coated screws provide better resistance where occasional moisture is expected. They are not automatically suitable for exterior exposure or constantly damp areas. Check the screw’s stated application and relevant building requirements. I once chose a general-purpose coated screw for a humid utility room; it held firmly, but early surface discoloration showed that “good enough” was a poor assumption. Conditions change. Choose accordingly.
Check Screw Quality, Holding Power, and Tool Compatibility
Choosing the right drywall screw starts with quality, not appearance. A sharp point and clean threads should drive smoothly without excessive cam-out. ASTM C1002-22 covers screw performance for gypsum panel installation, including torsional strength and head pull-through resistance. Its requirements are more reliable than judging a screw by shiny plating. For standard 1/2-inch gypsum board, 1-1/4-inch screws are commonly specified in residential code tables, but framing thickness can change the choice. I once selected screws by length alone. That caused weak fastening in a metal-stud repair.
Holding power depends on the substrate, thread design, and installation depth. The Gypsum Association’s GA-216 guidance commonly uses 12-inch spacing on ceilings and 16-inch spacing on walls, subject to assembly requirements. A screw set too deep can break the paper face and reduce its grip. Set it flush, not buried. In field work, I check a few fasteners by hand after driving them. It is slower. It also exposes mistakes early. Corrosion resistance matters in humid rooms; confirm the screw’s coating and application rating instead of assuming “rust-resistant” means suitable everywhere.
Tips: Match the bit to the recess, then test one screw in scrap board. Use a clutch or depth-control setting. If the head strips, the bit, speed, or screw quality may be wrong. Keep a few lengths nearby, because real walls are rarely perfectly uniform. ASTM C1002 and local code documents should guide final selection, not habit.
| Installation | Recommended Screw | Typical Length | Thread and Point | Holding Power Considerations | Tool Compatibility | Quality Checks |
|---|---|---|---|---|---|---|
| 1/2-inch drywall on wood studs | Coarse-thread drywall screw with a bugle head | 1-1/4 inches | Coarse threads grip wood; a sharp point starts readily in framing lumber. | Suitable for attaching drywall to wood studs when fastened into the framing. The screw should penetrate the stud sufficiently without breaking through its far side. | Use a drill or drywall screw gun with a Phillips #2 bit and a depth-setting nose or clutch. | Check for a centered head, clean thread profile, intact point, and a corrosion-resistant finish appropriate for interior use. |
| 5/8-inch drywall on wood studs | Coarse-thread drywall screw with a bugle head | 1-5/8 inches | Coarse threads are designed to engage wood framing; the bugle head helps seat the screw without cutting through the paper face when properly set. | The longer screw accommodates thicker board while reaching the wood stud. Holding depends on sound framing, adequate embedment, and correct installation. | A drywall screw gun is efficient for repeated fastening; set the nosepiece so the head is slightly recessed without tearing the paper. | Reject screws with bent shanks, damaged drive recesses, inconsistent threads, or flaking coating. |
| 1/2-inch drywall on light-gauge metal studs | Fine-thread drywall screw with a bugle head | 1 inch is commonly used; confirm the board and framing specifications | Fine threads are suited to thin metal framing; a sharp point is generally used for light-gauge studs. | Choose a screw intended for the stud thickness. A screw that is too short may not engage securely; one that is unsuitable for the metal gauge may strip or fail to penetrate. | Use a drywall screw gun or drill with a Phillips #2 bit and controlled depth. Avoid overdriving, which can strip the metal or break the paper face. | Look for a straight shank, sharp point, well-formed fine threads, and a drive recess that fits the bit without excessive wobble. |
| Drywall on heavier-gauge steel framing | Self-drilling drywall screw specified for the framing gauge | Choose a length that passes through the board and provides the required engagement in the steel | Drill-point design and thread form vary; select a screw rated for the actual steel thickness. | Performance depends on matching the screw to the steel gauge and following the framing or project specification. A standard sharp-point screw may not reliably penetrate heavier steel. | Use a compatible screw gun or drill at a controlled speed, following the fastener instructions to avoid overheating or stripping. | Verify the stated steel-gauge range, point style, coating, and drive compatibility on the product documentation. |
| Multiple drywall layers on wood framing | Longer coarse-thread drywall screw selected for the total board thickness | Often 2 inches or longer; determine length from the full assembly and required stud penetration | Coarse threads are generally used for wood framing; select a length that reaches the stud through every layer. | Each screw must engage the framing, not just the face layer. Follow the wall or ceiling assembly specification because layer count and board type affect fastening requirements. | A screw gun with a depth setting helps maintain consistent seating through thicker assemblies. | Confirm the specified screw length and application; do not substitute a shorter screw based only on the outer board thickness. |
| Areas exposed to persistent moisture or exterior conditions | Fastener specifically approved for the exposure and board system | As specified for the assembly | Thread and point must match the framing material; the coating must be rated for the environment. | Standard drywall screws are generally intended for interior dry conditions and may corrode in unsuitable environments. Use the fastener specified by the system manufacturer or applicable building requirements. | Match the drive type to the bit and tool; use corrosion-resistant compatible accessories where required. | Check documented corrosion-resistance and application ratings rather than relying on appearance alone. |
Article Source:
Exclusive Access
Unlimited Resources
Detailed information on our products to assist you with the planning of your cable management project
Register Now